How to create a Google AdWords Campaign
Tuesday, September 27, 2016
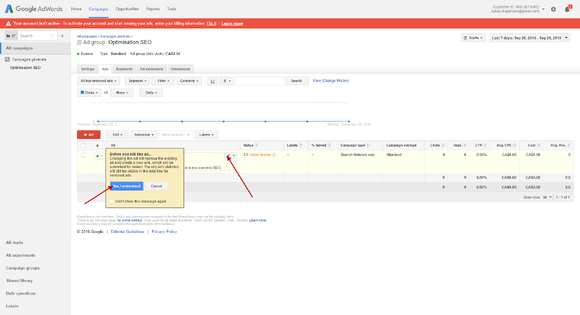
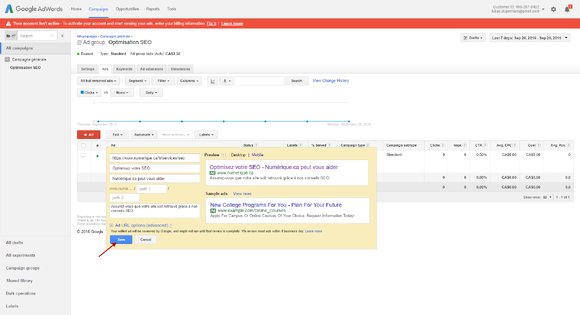
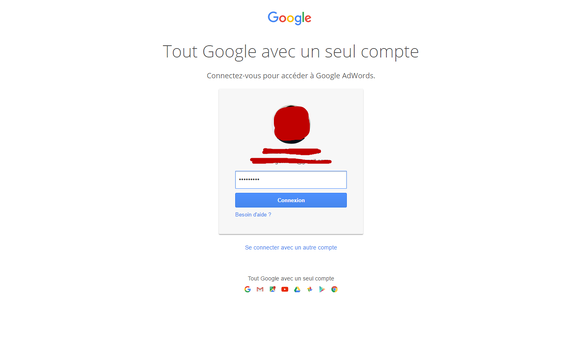
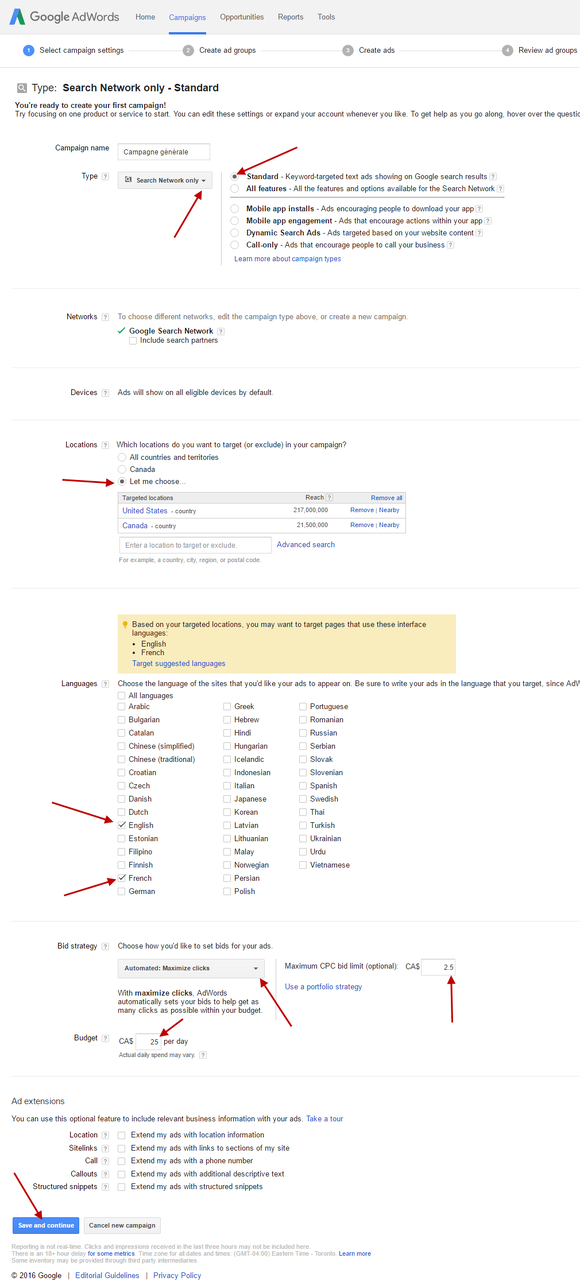
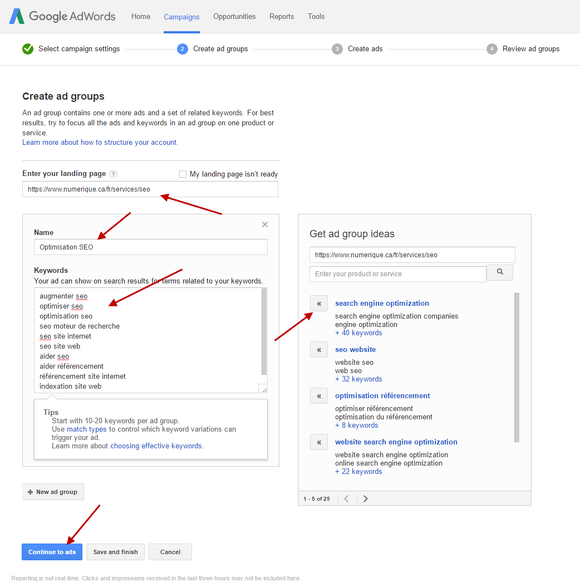
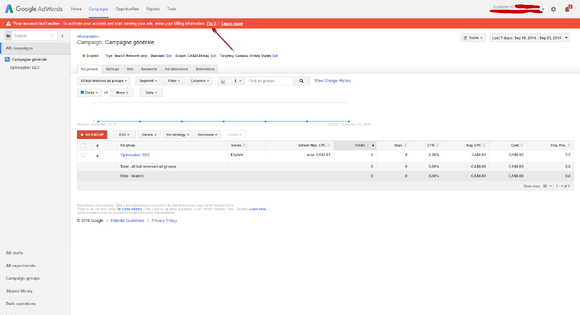
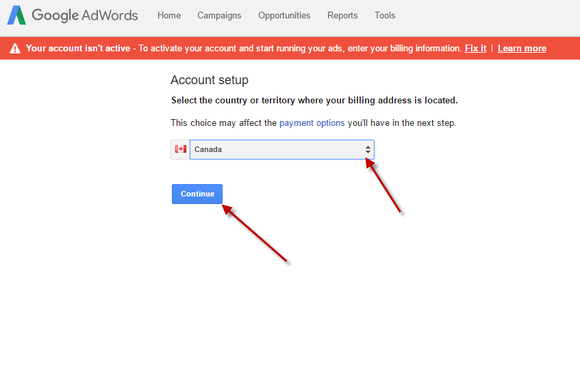
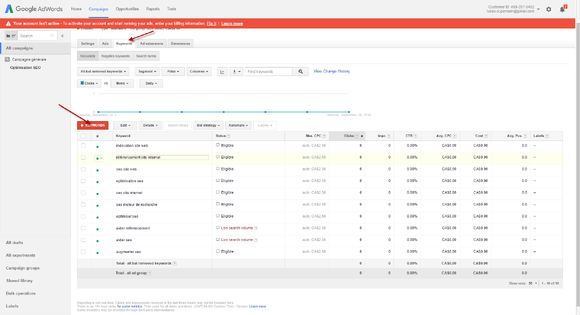
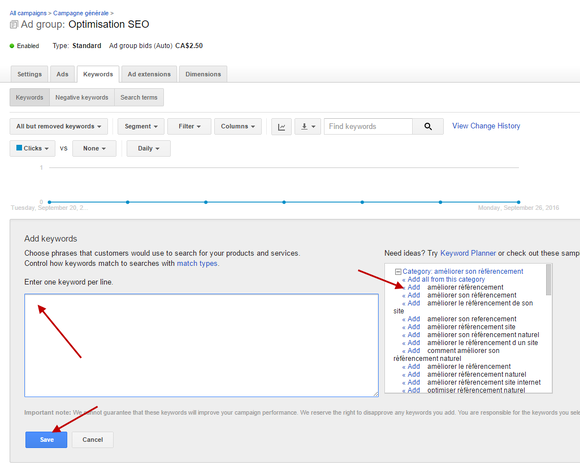
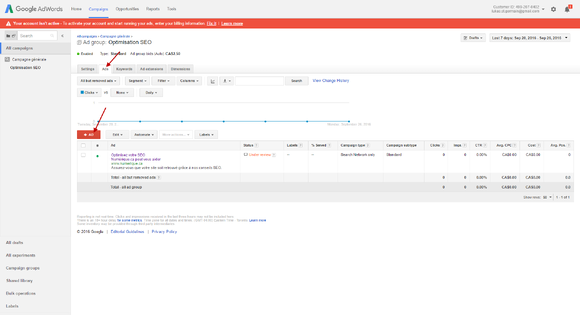
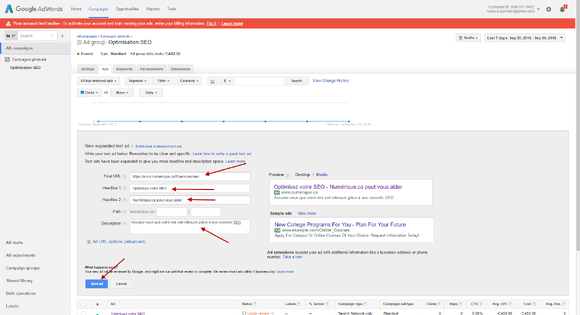
Knowing the importance of Web marketing for our clients, Numérique.ca has decided to implement a campaign management strategy that allows our customers to do SEM (Search Engine Marketing) at a low cost. Most agencies (actually, almost all of them) take a percentage on their clients' total campaign budget, all the while charging management fees at the same time. On our side, to encourage our clients to do SEM, we decided to only charge our clients for the time we spend managing your campaign, so that you can use 100% of the budget you planned for Google. That being said, even with our low fees, nothing beats $0. So we decided to help you out even more by giving you a step-by-step guide on how to manage your own AdWords campaigns so that you can save on all your management fees. To create a Google AdWords campaign, you must first have a Google Account. It could be your Gmail, YouTube or something else, but you must have an account. If you don't have one, you can create a new one here. Once you have access to your Google Account, go visit the following URL: https://adwords.google.com. Make sure that it's your account and enter your password to connect. To start, once connected, you have to click on the "Create your first campaign" button on the top of the page. Now, you're ready to configure your Google AdWords campaign. If all you need is to display your ad in Google's search engine, we recommend you select the following parameters: Once all your parameters are set, click on the "Save and continue" button at the bottom of the page. We're now on the page that allows you to create your ad groups. For starters, you have to enter the URL of the page you want to bring your visitors to for this ad group. After that, give that group a name and enter your keywords in the "Keywords" field. You can also quickly add keywords by using the buttons on the right, in the "Get ad group ideas" section. Finally, once all your keywords are entered, click on "Continue to ads". Don't worry if you're affraid that you forgot some keywords, you can always add some new ones later! Once your ad group is created, you have to create your ad. All you need to do is fill out all the fields in the left pane and click on "Create ad". While creating your ad, you can even see a preview on the right! After you've created your ad, don't forget to click on "Save and finish" at the bottom of the page. Before Google can publish your ads, he must get your billing information. Since no information is currently entered, Google is displaying a red bar on the top informing us that something's wrong with our payments and recommends we fix it. Since that's what we want to do, we'll click on the "Fix it" link in the red bar. We have to start by telling Google in which country we should be billed. In our case, we selected "Canada" and clicked on "Continue". In the next step, you have to enter all the payment information. You have to specify if it's for a company or an individual, your name, address, credit card information, etc. Basically, you have to fill out all the fields and, once completed, click on the "Complete signup" button. Don't forget to accept all the terms and conditions otherwise you won't be able to go to the next step! You're now ready to receive clients on your website via your AdWords campaign! That being said, we still recommend you follow these extra steps to increase your campaign's performance. In these steps, we'll show you how to add new keywords and create a new ad for your campaign. To update the keywords used for an ad group, you have to start by clicking on the ad group you want to make the changes to. Once done, you'll be in the "Keywords" tab by default. Click on the red "+KEYWORDS" button and you'll see a new window appear. In that window, you can add all the new keywords you want (make sure you separate all your keywords with an ENTER). You can also add a bunch of useful keywords by using the "Add" link on the right side of the window. Once all your new keywords are entered, just click on "Save". To create a new ad, you have to go in the "Ads" tab and then click on the red "+AD" button. You'll find pretty much the same form that you previously filled out. All you need to do is enter your new information and click on "Save". Just as before, you can see a preview on the right side of the window. To update an existing ad, start by making sure you're in the "Ads" tab. Then, all you need to do is bring your mouse on the ad you want to update and you'll see a pen icon appear in the upper-right corner. Click on the pen. A small window will appear warning you that you're about to make changes to this ad and it might cause problems. You have to click on "I understand". The reason why Google warns us about what might happen if we make changes, is that if we change the ad, the statistics we had with our previous ad won't necessarily be the same as what we would've had with the new one. To prevent these problems, we recommend you create a new ad. That being said, if all you want to do is change a couple of words or fix a typo, don't hesitate to update your current ad. Once you told Google you understand the "risks" in modifying your campaign, you'll see a new window appear that allows you to update your current ad. You just need to make the changes you want and click on "Save". As always, a preview is available on the right side. As you can see, creating a Google AdWords campaign isn't that complicated. You'll now be able to create your own campaigns, manage your keywords and use 100% of your marketing budget on your ads, without ever paying management fees again!Connect to your Google Account
Create your first campaign


Activate your account by entering your billing information

Update your ad group's keywordS

Create a new ad
Update an existing ad
